October 25, 2010

Scanography

"Girl". 10/21/10, 9:23 am. Romney Photo Lab, BYU-I Campus, Rexburg, Idaho. Flatbed Scanner.

After scanning this I brought up the exposure, blacks, and contrast in RAW, and then cropped it in Photoshop. I chose these items to scan because I was trying to do a self-portrait of sorts. These are my old worn out biking gloves, my bike computer showing how many miles I've ridden on my road bike this year (pretty good considering I've hardly ridden since injuring my foot July 3rd), my favorite necklace, and my favorite tie-dyed shirt as the background.


"Space Skirt". 10/21/10, 10:21 am. Romney Photo Lab, BYU-I Campus, Rexburg, Idaho. Flatbed Scanner.

Recovery, blacks, brightness, and contrast adjusted in RAW.


"Space Suit". 10/21/10, 10:12 am. Romney Photo Lab, BYU-I Campus, Rexburg, Idaho. Flatbed Scanner.

Adjusted blacks and fill light in RAW.


"Glass". 10/21/10, 10:02 am. Romney Photo Lab, BYU-I Campus, Rexburg, Idaho. Flatbed Scanner.

Adjusted the exposure, recovery, fill light, and blacks in RAW. I also used an adjustment brush on the highlights so that they wouldn't be blown out.


"Have Space Suit, Will Travel"


This image is the result of my three-part scan. When trying to figure out what to scan my husband suggested one of his favorite books by Robert Heinlein; that set off the space theme and I ran with it. I think the pattern on the skirt is a perfect background, so I brought in the picture of the book next, expanded it with the transform tool, positioned it where I wanted it, and then used the vivid light blending mode to help it blend in. Next, I added "glass"; to it I expanded and turned the image, and used the warp function in the transform tool to move it around and give it some movement so that it feels more like a black hole. I then used the pin light blending mode at 77% opacity to merge the images together. To finish it off I cropped the image.

Edge Effects

"The Boys". 10/17/10, 10:17 am. Lorenzo, Idaho. f/4.2. 1/400 sec. - Nikon D60.

For this image I changed the exposure, brightness, and contrast in RAW. In Photoshop I cropped the image to 9 x 7 and rotated it slightly. I then increased the canvas size to 8 x 10 and used the eyedropper to select the brown color from the image for the canvas extension color. Next I set up some grid lines so I knew were I wanted my inner border and selected the rectangle tool and drew a white rectangle to fit my grid lines. I then added a layer mask to the shape layer and with the fill pixels option of the rectangle tool I drew another rectangle inside the white shape; this left the white strip on the image. Next I reduced the opacity of the layer and then added a motion blur to the layer at 45 and 90 degrees with a 45 pixel distance. Last I used the text tool to add the caption, using a color from the background for the color, double clicked the layer which brought up the layer style guide, and added a drop shadow to the caption.

"Geologist". 10/23/10, 8:32 am. Mill Hollow Road, Rexburg, Idaho. f/25. 1/4 sec. - Nikon D60. Tripod.

For edits in RAW I raised the blacks, lowered the clarity, and painted some color into the sky. With the image in Photoshop I then cropped the image to 6 x 7.5 at 300 ppi. I then increased the canvas to 8 x 9.5 and used a blue color from the subject's sleeve as the canvas extension color. I then added an additional half inch on the bottom of the canvas by extending the canvas to 10 inches high by clicking on the upper center arrow in the canvas extension box. I then drug a guide into the center of my image from my side ruler. Then in the Character palette I chose Gil Sans as my font, 18 pt, smallcaps, and for the color I used the eyedropper to get the light blue of the sky. With center alignment I held down the caps lock key as I clicked on my guide below the image and titled my image. Last I added another layer and used black paint at 65% opacity to make my border darker.


"Run Zombie Run". 10/23/10, 5:28 pm. The Riot Zone, Rigby, Idaho. f/9. 1 sec. - Nikon D60.

This is my favorite image of the week. My husband ran a Zombie 5k last weekend. He was so excited about it so we painted his face and destroyed his green shirt to look like he'd been eating brains for a few days. It was a lot of fun, and he improved his 5k PR by almost two minutes!

Edits on this image started out in RAW with recovery, less blacks, brightness, contrast, and saturation. In Photoshop using the paintbrush tool I added more blue to his iris' and more red/bloodshot to his eyes. I also painted his neck and eyes a little more gray to match the rest of his face, and intensified the red around his mouth. I then used a dry brush filter to give him an animated feel.

Then I saved the image with layers, and flattened the image and saved it as a .jpg. With the .jpg open I hit Ctrl+A to select all the pixels, deleted the image, and made sure that black was my background color. Then having selected the box next to before I erased my image, I used my history brush and three of the thick heavy brushes to paint back the image. The brushes were at varying sizes and about 70% opacity. Next I added canvas space around the image, using the eyedropper tool to get the color from his grayed skin, one inch on each side except the bottom edge, which was one and a half inches. Last I added the caption with the text tool, and put a drop shadow on it as well.

I really like this edge effect on this picture in particular because it makes me feel like he's scratched and scraped his way though a wall or something to get at your brains . . . I love it!

October 19, 2010

Portraits

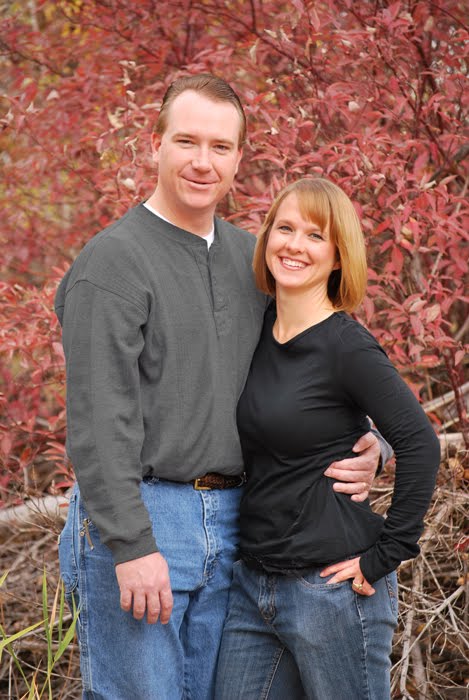
My friend Mitzi and her family were gracious enough to let me take some shots of them this past weekend, and I've got SO many that I love, I have to share more than just a few with you.

"Scouters". 10/17/10, 10:06 am. Lorenzo, Idaho. f/5.3. 1/250 sec. - Nikon D60. Tripod. Original with no edits.

I loved this shot because the dogs were looking at me, but Mitzi's and Kyle's faces were a bit off . . .

"Scouters 2". 10/17/10, 10:06 am. Lorenzo, Idaho. f/5.3. 1/250 sec. - Nikon D60. Tripod. Original with no edits.

So I selected Mitzi's and Kyle's faces off of this shot where the dogs aren't looking at me . . .

. . . and pasted them onto a new layer to create this image. When putting in Kyle's new head I also had to clone out his left ear so I made a copy of the background and colored over the left side of his head with some of the woodsy background.

"Wrigley". 10/17/10, 9:51 am. Lorenzo, Idaho. f/4. 1/320 sec. - Nikon D60. Original with no edits.

My friend Mitzi wanted some portraits of her new puppies too, so here is the original of Wrigley. His eyes are pretty dark, so I wanted to lighten them up a bit.

So in camera RAW I raised the overall exposure, blacks, brightness, and contrast. Then with an adjustment brush I raised the exposure on his eyes and ear a little more. Then in Photoshop I did some color dodging with a paintbrush in his eyes to bring in some more color.

"Kyle Salute Original". 10/17/10, 10:14 am. Lorenzo, Idaho. f/4.8. 1/250 sec. - Nikon D60. Original with no edits.

I thought that taking some pictures of the scouts saluting would be fun, but I didn't notice (until after the fact) that his patch was turned backwards . . .

"Patch". 10/17/10, 10:10 am. Lorenzo, Idaho. f/5.3. 1/250 sec. - Nikon D60. Original with no edits.

So I used the patch from this image . . .

. . . and added a layer on the original image with the patch turned the right way, then transformed it to lay over the backward patch. I also used an adjustment brush in RAW to raise the exposure on his eyes, and then in Photoshop color dodged his eyes a bit more and added some "specular highlights" in his eyes.

"Dot". 10/17/10, 9:53 am. Lorenzo, Idaho. f/4. 1/200 sec. - Nikon D60. Original with no edits.

Such a pretty little poser, but her eyes are too dark as well.

So first off in RAW I raised the exposure, brightness, and contrast, and then used an adjustment brush on her eyes and the colored "butterfly shaped" section that make up her ears and cheeks. In Photoshop I used a color dodge paintbrush to add some color to the eyes and lighten paintbrush to add highlights.

"The Whole Fam Damily". 10/17/10, 9:47 am. Lorenzo, Idaho. f/4.2. 1/100 sec. - Nikon D60. Tripod. Original with no edits.

Love. This. Shot.

Environmental Portrait

For my environmental portrait I used my husband as the subject. He's got a Linear Algebra math test this afternoon. He's kind of a procrastinator so every time a test comes up he spends multiple days beforehand catching up on his homework in the MC. He works there because he likes the natural lighting and he can watch the construction workers when he's trying to think out a problem.

"Impatience". 10/18/10, 9:59 am. Manwaring Center, BYU-Idaho Campus, Rexburg, Idaho. f/6.3. 1/40 sec. - Nikon D60. Original with no edits.

I was trying to figure out which white balance would be the best for the location, so in trying to get it right I took this shot, which I like the best, but the sky is blown out and the color is very cold. I like it especially because he's giving me a "areyoufreakingkiddingme--stoptakingpicturesofme" look and his hand is blurred because he's impatiently waiting to get back to work.

So in RAW I changed the white balance to "shade" and then raised recovery, blacks, brightness, and the contrast. I then used an adjustment brush to raise the exposure, brightness, contrast, clarity, and saturation on him and the rest of the foreground. I like this because it really sets him apart from the background and makes the blur more intense in the background. Last, I painted in some blue sky with another adjustment brush so that it had some more color. Perhaps I may be becoming more of a Type Four photographer after all.

Editing Portraits

Enhancements

"Danen". 10/17/10, 10:35 am. Lorenzo, Idaho. f/5. 1/100 sec. - Nikon D60. Tripod. Original with no edits.

Danen looks pretty good in this shot, but I did whiten his teeth slightly by adding a hue/saturation layer and then lowering the yellow channel. I also used a color dodge paintbrush on his eyes a bit to bring in more blue and intensify the highlights.

Replace Color

"Doug & Mitzi". 10/17/10, 10:37 am. Lorenzo, Idaho. f/4.8. 1/50 sec. - Nikon D60. Tripod. Original with no edits.

For Doug's shirt I used the quick selection tool to select his entire shirt, and then through layer, adjustments, replace color I tweaked his shirt to more of a middle grey color. I like the more neutral color with Mitzi's shirt.

Match color

"Color Source". 10/17/10, 10:00 am. Lorenzo, Idaho. f/5.6. 1/40 sec. - Nikon D60. Original with no edits. I really like the brightness of this shot, but the sky is too blown out and I couldn't do much with it in RAW, so I used it as the color source for the next image.

"The Girls". 10/17/10, 10:00 am. Lorenzo, Idaho. f/5.6 1/200 sec. - Nikon D60. Original with no edits.

With this original image in Photoshop I went to layers, adjustments, match color and selected "Color Source" as where I wanted Photoshop to draw the info from and then lowered the luminance, raised color intensity, and brought up the fade.

I like how the color match adjustment brightened the image a bit and gave better highlights on Mitzi's face. What a cool tool!

October 11, 2010

Panoramic


"Panos 1-4". 10/9/10, 3:42 pm. Logan, Utah. f/9. 1/1600 sec. - Nikon D60. Above are my original images with no edits.

For my edits I brought all four pictures into RAW at the same time, and brought up the lightest image on my screen then selected all four images. I then adjusted my exposure and contrast and added recovery to make sure my clouds didn't blow out. Next I saved my raw files as digital negatives.

I then used the photomerge tool in Photoshop to create the Panorama. Then I used an adjustment layer to bring up my exposure even more to make sure the bottom of the sign and underneath the car weren't blocked up. I then masked back in all of the sky at 100% opacity and parts of rest of the image at varying opacities. Next I used a strong saturation Hue/Saturation layer to the sky, car, and sidewalk for an extra pop of color. Lastly I cropped the image.

"#1 Dad".

As a little background behind the picture its self, while on my way to Utah for the weekend my car broke down. I had it towed to Logan and stayed the night with an old roommate there. The next day my Dad and his cousin drove up from Sandy to rescue me and replace the alternator. I felt kinda like white trash fixing the car in the parking lot, but my Dad's magic touch worked and I was able to safely drive home with no worries.

Camera Raw

"Drawers". 9/29/10, 9:56 am. Dubois, Idaho. f/10. 1/40 sec. - Nikon D60. Tripod, silver reflector card reflecting on left side of drawers. Above is the original image with no edits.

For my adjustments in camera raw I added fill light, blacks, brightness and lowered the contrast. Then I used an adjustment brush on the front of the dresser drawers and the lit part of the floor to lower the exposure and brightness.

October 5, 2010

Portraits

"Kimber". 9/29/10, 1:30 pm. Bannack, MT. 1/250 sec. - Nikon D60. Tripod, gold reflector. Brightness and contrast adjustment in RAW. Clone stamp tool in Photoshop.

I knew I wanted a shot next to the awesome warm wood on this shed, but having Kimber in the direct sunlight would have been too harsh, so I had her sit in the shade and someone reflected some light into her.

"Meeshelle". 9/29/10, 2:58 pm. Hotel, Bannack, MT. f/4.2. .3 sec. - Nikon D60. Tripod. Recovery, brightness, contrast, and white balance adjustment in RAW. Slight crop in Photoshop.

The Bannack veterans were right when they suggested getting portraits in the hotel, because the light is perfect--soft from both sides and it gives off a nice ratio with this short open loop posing.

Action Blur & Freeze

"Two". 9/29/10, 2:13 pm. Bannack, MT. f/6.3. 13 sec. - Nikon D60. Tripod. Recovery, blacks, brightness, contrast adjustments in RAW.

For this shot my group and I were in a dark room in the back of one of the shacks. We first tried getting ghost trails, but there was too much light for the trails to register, so this shot with two ghosts made for something a little different.

"Escape Route". 9/29/10, 3:09 pm. Hotel, Bannack, MT. f/4. 1/1600 sec. - Nikon D60. Exposure, blacks, brightness, contrast adjustments in RAW. Slight crop in Photoshop.

In this image I can see our escapee jumping off the hotel porch trying to dodge bullets and make for the sunset . . . but in reality it was a total staged jump. I do like the texture in the lattice and that you can see through the window into the staircase though. I think I got lucky with this one.

Reverse Shallow Depth

"Distance". 9/29/10, 2:28 pm. Bannack, MT. f/5.3. 1/2000 sec. - Nikon D60. Tripod. Exposure, blacks, fill-light adjustment in RAW, clone stamp in Photoshop.

"Planks". 9/29/10, 2:28 pm. Bannack, MT. f/5.3. 1/2000 sec. - Nikon D60. Tripod. Exposure, blacks, fill-light adjustment in RAW, clone stamp in Photoshop.

On these shots I wanted to try and get a different perspective, so I lowered my tripod and tried for the best. I think I was practically laying on the ground trying to get the right composition and focus. The clone stamp in Photoshop was used to get rid of some spots that were on my lens from junk. I feel like I'm always cleaning that thing.

Macro Abstract

"Tarnished". 9/29/10, 6:27 pm. Saloon, Bannack, MT. f/5. 1/320 sec. - Nikon D60. Tripod. No edits.


"Seep". 9/29/10, 2:50 pm. Hotel, Bannack, MT. f/4.2. 1/40 sec. - Nikon D60. Tripod. No edits.


To create this abstract texture effect I flipped "seep" horizontally, expanded it, and then angled it a bit until I liked where it lay over "tarnished". I then used the color dodge blending mode and kept the opacity at 100%. I then masked back in the earrings and added an adjustment levels layer to the shadows of "tarnished".

HDR Edits

"Temple Reflection". 9/29/10, 3:32 pm. Masonic Temple, Bannack, MT. f/5.6. 1/200 sec. - Nikon D60. Tripod. No edits.

This shot is a reflection looking back at the Masonic Temple.

This is my one shot HDR. I took enough shots to do a full HDR, but I like how this one shot worked out. Very moody. I used the "Mysterious Light 4" for the color effect.

"Stairs 1". 9/29/10, 2:41 pm. Hotel, Bannack, MT. f/8. 1/200 sec. - Nikon D60. Tripod. No edits.

"Stairs 2". 9/29/10, 2:40 pm. Hotel, Bannack, MT. f/8. .4 sec. - Nikon D60. Tripod. No edits.

"Stairs 3". 9/29/10, 2:40 pm. Hotel, Bannack, MT. f/8. 1/10 sec. - Nikon D60. Tripod. No edits.

"Stairs 4". 9/29/10, 2:40 pm. Hotel, Bannack, MT. f/8. 1/40 sec. - Nikon D60. Tripod. No edits.

I merged quite a few HDR images, but this one definitely looks the most realistic, most of the others had crazy colors and effects that were too much for me, but I like how this one turned out. I especially like how the colors are reflected on the ceiling. If I could take this shot over though, I would step more into the middle of the room to get the staircase more strait on. Also, I wish I would have gotten some shots looking up the stairs. Oh well, perhaps next time.